
01/23/07 – Continuing
the Transmission Mount
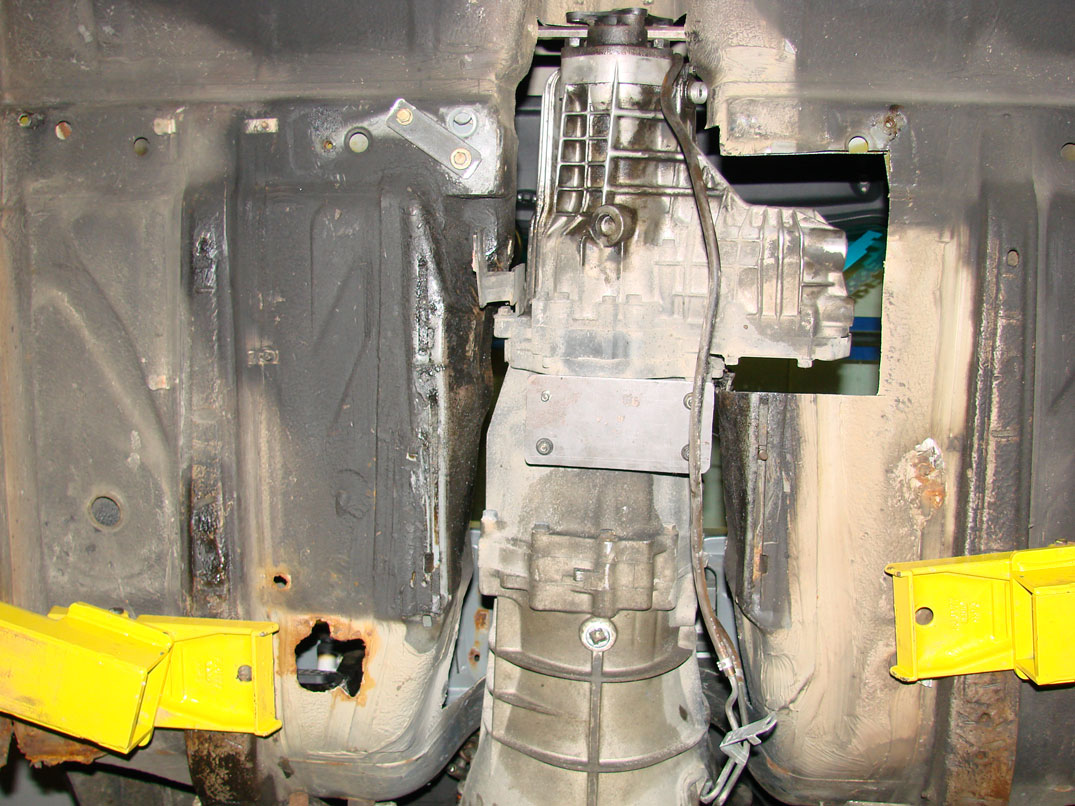
The first thing I did when I arrived was make the rest of the bolting tabs for the transmission mount. These were fabricated from 1/4 X 1 1/4 HRS flat stock. There were a total of four. The center plate is 10GA Mild steel. I obtained some 1 X 1 X 11GA square tube to use for the frame.1
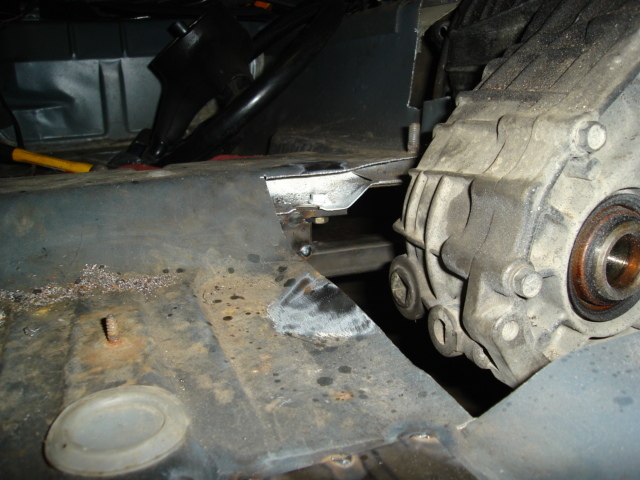
The next step was to fix the rear passenger transmission mount point. As you can see in this old picture, one of the mounting bolt holes (upper right) was removed to allow for clearance of the differential.
The manner in which the floor was cut allowed access to the area near where the nut had been, so I simply drilled a hole and tacked a nut in place. I then sprayed everything with primer to prevent rusting. Done.2
Next, I fabricated the front of the transmission support. This support is also an integral chassis member, as a substantial amount of rigidity has been lost when the formed tunnel was removed. Since there will be substantial stress on the member, it was important to have it bolt to a substantial support. The solution was to weld 7GA plate on the inside of the chassis. The location of the plates is such that the outside edge of the support is actually welded to the "frame rails" of the car. The steel is a pain in the ass to weld on, and welds like crap. I am not the best welder, or even decent, but there is something in the chassis that makes it very "spattery".3 I cleaned the metal VERY4 thoroughly.
On the passenger's side, the floor was very solid. This is the plate I welded in:
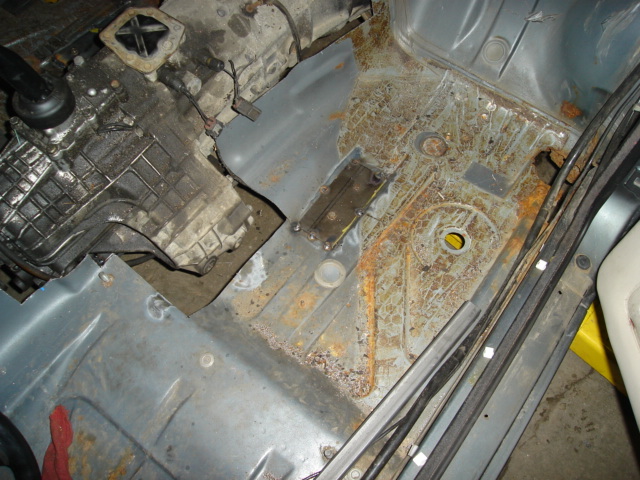
On the driver's side, the floor had been compromised a bit more by rust, so I used two plates. A slight bend was required and with no brake press in sight, I used a seam as opposed to a bend. Before tacking these in place, I used a wire wheel to grind off ALL the rust underneath the plates. I still need grind off the undercoating before welding it. I started laying a bead and almost asphyxiated5. Photo of the driver's side:
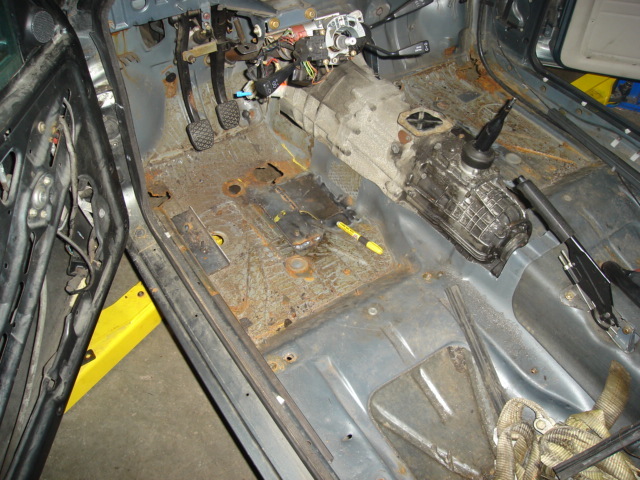
Next, I simply just welded up the frame. Some slight changes had to be made from the initial plan. These changes allow for better clearance, both ground and transmission. I still need to weld on two more braces that tie the mounting points together fore and aft. Here are pictures:
Engine is nice and straight:
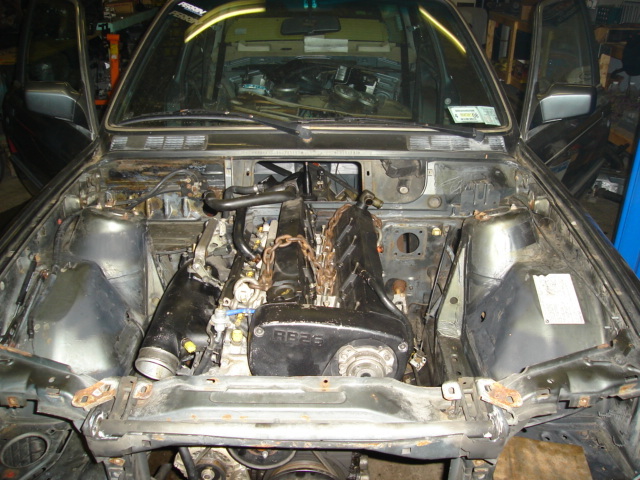
View from the front:
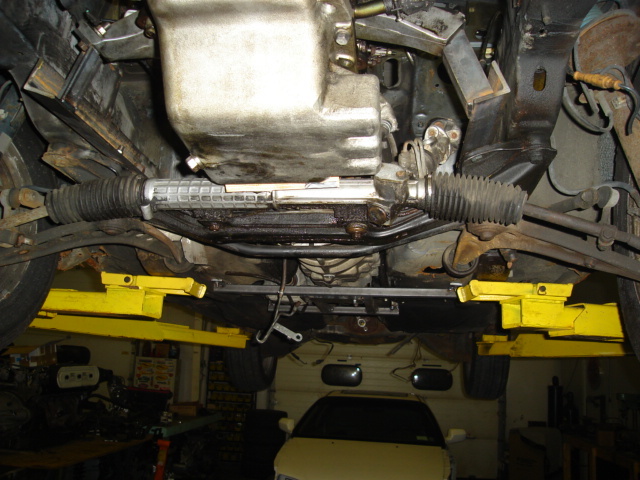
View from the rear:

View from underneath:
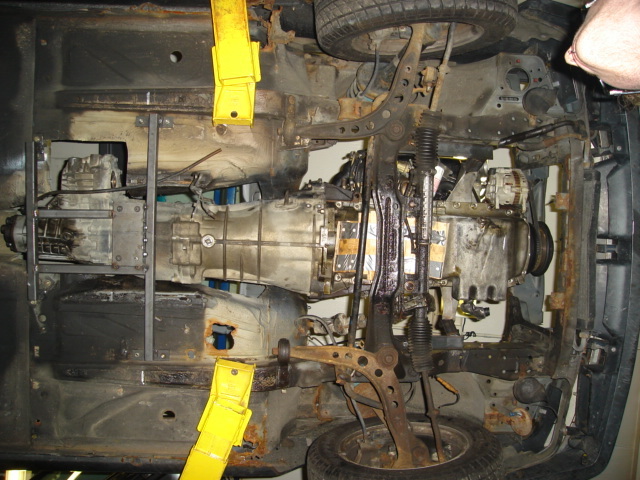
Some research yielded information about driveshaft angles. The motor was moved up slightly from its original position to allow for a closer driveline angle. The rear differential may need some slight shimming so it points upwards slightly more, but all in all, it is very close to perfect.6
I actually had to go back in and cut out a lot of the
chassis that I covered over, because I realized that I had encapsulated
rust. Admittedly, I
didn’t know much at
all about how to deal with rust…
The transmission
mount will add a lot of strength to the chassis.
Between the cage, seam welding and this, I think
the car is going to be very rigid.
It
was nice to get the engine and transmission in the car.
It felt like quite an accomplishment, even
though it didn’t take nearly as long as
“simpler” aspects of the project.
(1) Thank you, scrap bin at work.
(2) Hope that nut holds…
(3) Turns out BMW Chassis are galvanized, making welding on them a real PITA.
(4) Well, at least fairly
(5) This undercoating probably caused more headaches (literally and figuratively) than anything else in the project
(6) I think I was overly concerned about driveline angle, trying to get it to within a tenth of a degree…
